Keeping your natural nails healthy is the most desired goal in nail removal. I’ll reveal the safest professional methods to remove polygel in this tutorial.
Polygel nails are the latest trend in the nail art industry. The reason is that they bring in the best features of acrylic and gel nail types to create a long-lasting and unique style you’ll love.
Also, the polygel removal process is quick and easy as compared to gel extensions and acrylic nails.
But it’s essential to know the proper application and removal methods of polygel nails to maintain strong and healthy nails.
That’s where Ultrabeautify comes in! We believe in making salon-quality polygel manicures available to everyone at home. Therefore, in this guide, we have put together 3 different methods of removing different types of nails, including polygel.
So, don’t hesitate to try exciting new styles like nail dipping or polygel nails, and always remember to take care of your natural nails properly!
Method 1: Remove Polygel nails using oil & soap Without acetone

There’s a polygel removal hack going viral on TikTok and Instagram claiming that you can remove your polygel nails with a mixture of hot water, any baby or edible oil, and a dishwashing detergent or soap. So, I tried to check if this viral Hack works. Here’s how it’ll work.
The Hack claims that Removing your Polygel Nails at home is now possible without using acetone or a nail drill using oil, soap, and water.
Things you need
- Any type of cooking oil/ baby oil
- Detergent or body wash
- Warm water
- A cuticle pusher or any flat thing
Steps to remove
- First of all, you’ll need to gently lift up the edges of your polygel nails using your cuticle pusher.
- The reason why you raise the edges is so that the oil and water mixture can be absorbed underneath the nails.
- Mix your oil and detergent together with warm water, then apply it under the nails.
- Next, soak your nails for 15 minutes in the mixture.
- Using a cuticle pusher, lift the edge of your nails gently once the soak has been completed.
- Soak your nails again for a few minutes if they are still stubborn.
Experts’ Opinion: Does this polygel removal hack really work?
Before trying this Method, I wondered if this Method works then whenever I do dishes or take a hot bath, my polygel nails would pop off every time. But the truth is, this Method hardly works for polygel nails, and even after soaking my hands for 10 minutes, I didn’t notice any edge to be lifting, so this method might work with press-on nails but not with Polygel nails, in my opinion.
Method 2: Remove Polygel nails with E-File or Hand File

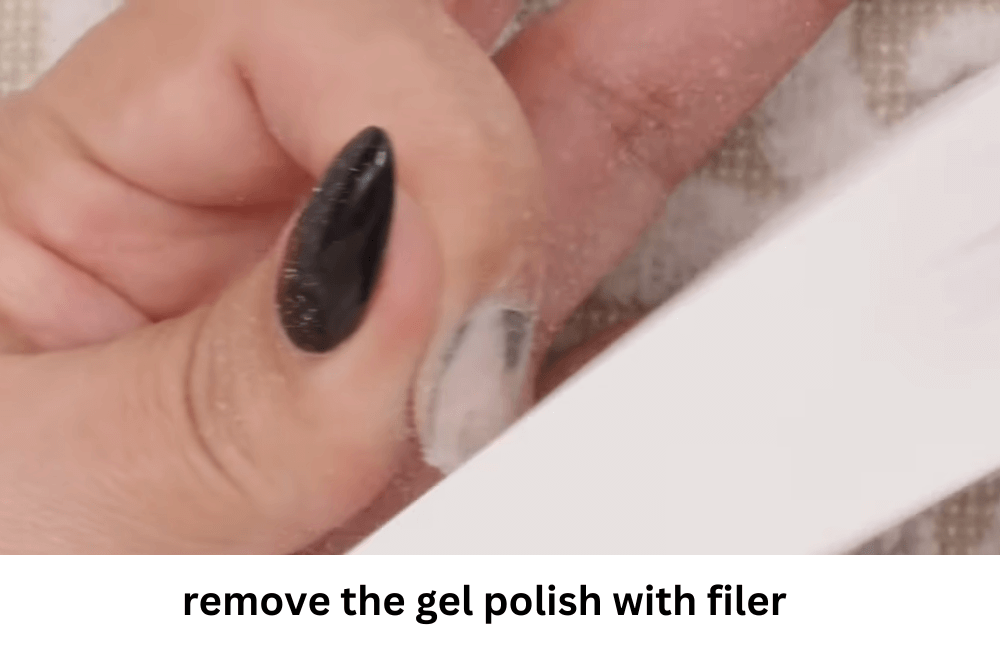
Using a high-quality nail file, you can remove the polygel nails without damaging your nail surface. Here’s how to correctly remove polygel nails at home with e-file steps:
- Take the file and start by taking down the extra length of the nail by filing.
- Once you have trimmed the lengths, start filing through the top coat; you have to take care of the cuticles while filling the gel color. Ensure the file has at least a 100 or 200-grit surface to get premium results.
- After removing the gel color, keep filing the tip of the acrylic nail until it reaches your natural nail. The expert tip is not to file down all the acrylic nails; you can leave a very thin layer on the natural surface.
- Now, apply and massage oil on the cuticle area or hand lotion to keep them healthy.
Method 3: Remove Polygel Nails with a nail drill

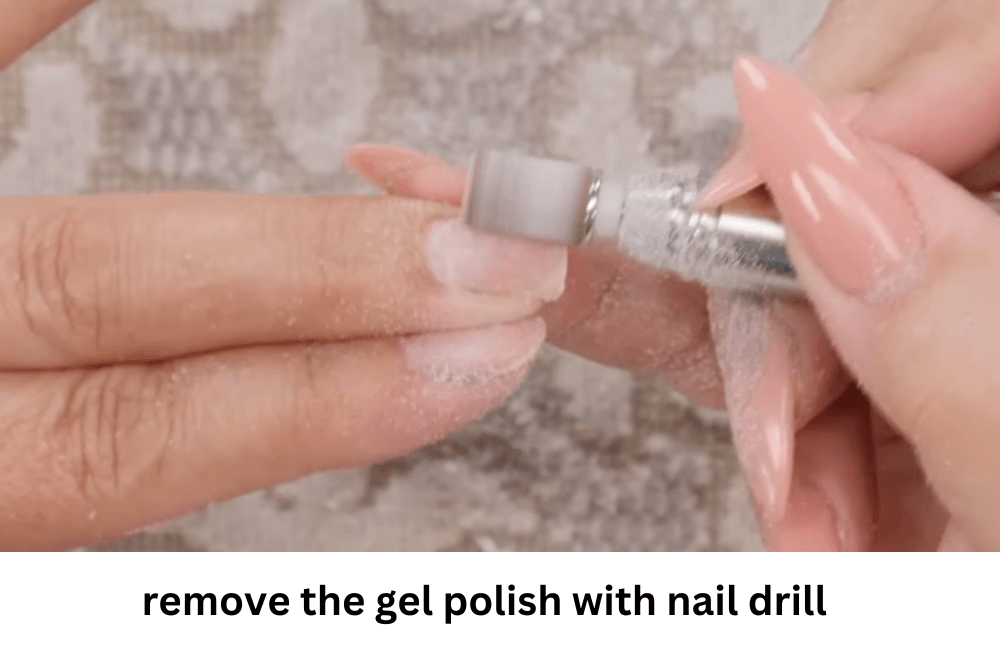
If you want to know how to remove polygel nails at home quickly, one of the fast and easy ways is to use a nail drill or an electric nail drill. It is extremely intimidating to use, especially if you’re new to it.
So, in this method, I will outline how you can easily and safely remove your polygel nails using an electric nail drill.
Steps to remove
- You should trim your nails first because excess length is the first thing to be done.
- To prevent the electric nail file from damaging your cuticles, you need to push back your cuticles with a cuticle pusher.
- Using a softer and smoother sanding band means you can file the polygel nails more gently.
- Using a coarser sanding band, you can gently file away the bulk of your polygel once you have filed the edges of your nails.
- To file your natural nails, you must avoid touching them as much as possible.
- To remove all the dust from your nails, wash them thoroughly.
- Once you’ve removed the polygel, you can manually remove the remaining polygel using a low-grit nail file.
- Last but not least, rehydrate your nails with numerous drops of cuticle oil.
Here’s one of my favourite nail drills to pop off polygel nails easily. It’s also portable and beginner-friendly. Give it a shot!
Below, I have included a vidoe tutorial link for your convenience.
Method 4 Take off Polygel nails using acetone without a nail drill

Many people are uncomfortable working with e-file or nail drills, so there’s another way to remove the polygel nail enhancement without a nail drill – with acetone.
Acetone soak is a fast and effective way that works wonders for most types of nails, including gel and acrylic nails and Polygel nail enhancements. The removal process takes only a few minutes, and so far, it’s one of the best methods for removing polygel nails, vouched by board-certified dermatologist Shari Lipner, MD, FAAD in American Academy of Dermatology Association (AAD) . I am going to explain how to do this process smoothly using acetone.
Things you’ll need
· Acetone
· Cotton balls
· Aluminum foil
· Nail groomer
Steps to remove
- Start by trimming off any excess extension or length on your nails, making them easier to work with.
- Apply petroleum jelly if you don’t have one, and use cuticle oil around the nail’s cuticle area.
- Your polygel nails need to have the top coat filed away. The most suitable tool for this is a low-grit nail file.
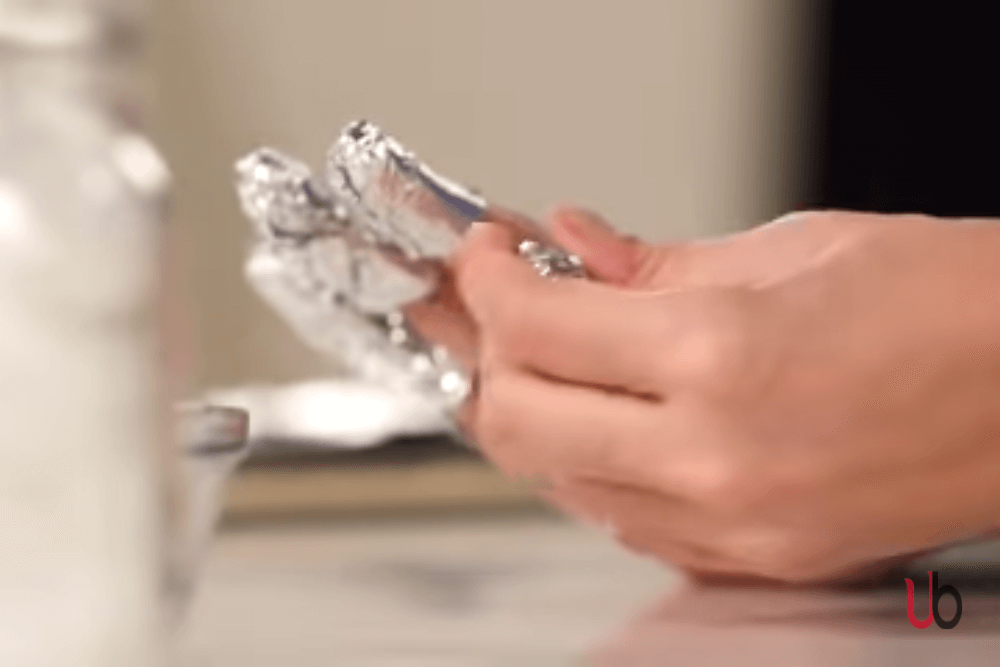
- Soak some cotton balls in acetone and place them above your nail surface. Make sure to cover the entire nail tightly. You can use nail clips or a foil wrap to keep them in place.
- Wait 20 minutes before removing the cotton pads.
- Remove the cotton balls, and if any polygel is sticking to the cuticles, file it down and scrape the nails with a cuticle pusher.
- When you finish the process, apply lotion or cuticle oil to keep the skin and nails healthy. Cuticle oil keeps the skin hydrated around the nail.
Here’re some poly gel nail kits for beginners you can try.
Tips to avoid damage during polygel nail removal

Its considered that acetone soak can harm your natural nail; however, if you opt right techniques, the process can be easy and safe. Here’re some tips for removing polygel nails safely.
- Before applying acetone on your nails, apply oil or petroleum jelly on the cuticle area to avoid direct contact with the skin. It’ll act as a buffer and protect the skin from direct exposure to acetone.
- Don’t use a sharp grit nail file to file the top coat; instead, use a low-to-medium-grit nail file. The low-grit nail file makes it easy for acetone to penetrate the polygel to soften it. Also, avoid scraping your natural nails underneath to get it done quickly.
- Apply cuticle oil to rehydrate the skin as acetone dehydrates the area, which may result in brittle nails.
Which Method is the Best to remove polygel Nails Properly: The Experts Choice
Daniela Fernandez, a nail expert, recommends acetone for polygel removal in allnailart. According to her, an acetone soak is totally safe and quickly removes polygel without much effort. However, if you don’t want to use acetone, try the “Gelish polygel removal system,” specially formulated to dissolve polygel. These polygel nail remover solutions are much less harmful than acetone, according to Gelish experts, the manufacturers of the polygel brand. But if you prefer not to use any polygel removal solution or acetone, then a nail drill will be the best option. Ultimately, it depends on your personal choice, as all these methods work well, according to experts.
