In nail art, builder gel, or BIAB (also known as builder gel in a bottle), is a durable and flexible product used to improve the look of nails. It’s meant to strengthen and lengthen nails, giving them structure and strength. Builder gel is different from regular gel nail polish because it is thick and sticky and hardens when it comes in contact with a UV or LED lamp.
Acrylic nails can damage your real nails, so nail art fans are increasingly choosing extensions that help you take care of your nails and make them stronger. Builder Gel, or BIAB, is becoming more popular because it strengthens your natural nails, and your nails will grow while still looking great for two to three weeks.
In addition to helping your natural nails grow and stay strong, you can make them longer with nail molds or enhancements (nail tips).
While considering your next salon visit, keep reading to learn why builder gel nails might be better than gel nail polish or acrylic nails.
What is Builder Gel for Nails

Builder gel is a special gel polish known for its strong, thick consistency. It is designed to strengthen or make natural nails look better with nail extensions, especially nail tips or other additions. Builder Gel in a Bottle (BIAB) and Hard Gel are the main types.
Moreover, builder gl in a bottle comes off easily if you soak in acetone. It’s a softer gel that makes a strong layer that lets nails grow naturally. It’s a great shield, especially for nail-biters.
On the market, you may find two types of building gel: soft gel for overlay and hard gel for extensions. The infilling process for builder gel nails is similar to that of acrylic nails. The hard gel is great for longer extensions because of its strength and durability, but BIAB is better for shorter ones or if you want a more subtle look. A longer manicure can be achieved using hard gel, but BIAB will give your nails a more natural appearance.
Builder gel functions similarly to conventional nail polish and is available in three shades: clear, nude, and light pink. Later, you can apply traditional nail polish or standard gel to your nails for color or interesting designs. You can also add an “overlay” layer to strengthen your nails. Use it to create shorter gel extensions or apply pre-shaped ones to your nails.
Hard gel, in comparison, is the thick kind that comes in pots. It builds a thick layer with different nail polish colours and finishes. Unlike BIAB, it requires filing down rather than soaking. Its toughness is comparable to acrylic’s, but it is more bendable and less prone to cracking.
What chemicals are builder gel made of
Oligomers, monomers, and photoinitiators are the main elements of builder gel. Together, these components create a strong, durable coating that can withstand regular use. Building gel goes through a curing process when applied to natural nails.
During this procedure, the gel undergoes a chemical reaction known as polymerization when exposed to ultraviolet light. The gel turns into a solid coating on the nail thanks to this reaction, which makes it tough and long-lasting. This will make your manicure extremely durable, protecting it from chips, peels, and lifting.
How to use builder gel:
Builder gel must be used in a certain way depending on the brand. Unlike others, Glossify can be applied directly to nails without a primer or base coat.
Applied to the natural nail only, builder gel is cured between layers to achieve the desired thickness and shape. You can extend your nail by applying a nail tip or form before applying gel.
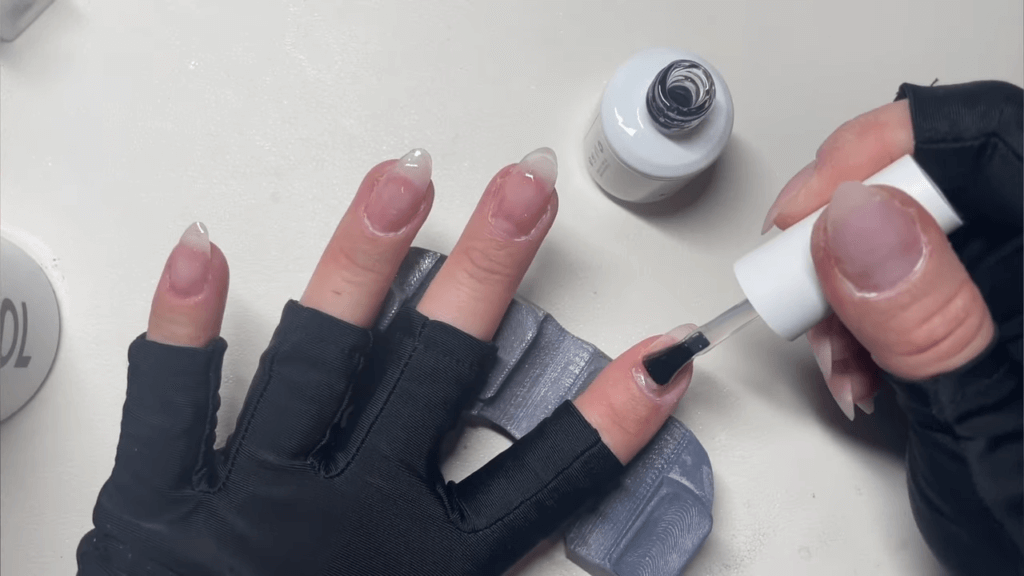
An application of a builder gel usually involves following these steps:
- Make sure the nails are clean, filed, and buffed. Push the cuticles back. Cleanse the nail using acetone or nail cleanser on a lint-free pad.
- You’ll need it once if the builder gel demands it. Let it dry under your nail lamp if necessary. It is possible to skip this step if you do not need a primer.
- Use a paintbrush to apply builder gel if you are applying a bottled product. You may need to use the nail brush that came with your gel pot to pick up a small amount. Cover the free edge of the nail and stay away from the cuticle. Allow the builder gel to sit for a few seconds to level itself evenly.
- It should state what lamp type and how long your chosen builder gel should cure under.
- The second coat can be applied if needed.
- Remove any tackiness by wiping it with a lint-free wipe and then using isopropyl alcohol.
- Apply your top coat after wiping the nail clean again. Paint on the gel polish with a different colour and cure again if the client wants a different color.
- You are now finished with your manicure! You have applied and cured your gel properly. Rub some cuticle oil into your nails.
Video Guide: How to apply Builder gel nails
What is the difference between builder gel and acrylic nails?
The main distinction between acrylic nails and builder gel is in their formulation and how they function. Acrylic nails are just as strong as hard gel, but they are more prone to cracking because of their lack of flexibility, in contrast to builder gel’s famed strength and flexibility, which makes it less likely to break when hit with hard surfaces.
It is important to analyze the benefits of each kind of nail extension or tip before making a final decision. The thin coating of builder gel in a bottle encourages healthy nail development with minimal harm to the natural nails. On the flip side, hard gel is strong, but it does require filing to remove, which could damage nails if not done properly. The hard structure of acrylic nails poses risks to the natural nails, such as excessive filing and breakage from accidental bumps, and can weaken the nails over time.
Ultimately, it all comes down to personal opinion when deciding between acrylics and building gel. Builder gel is a great alternative for individuals who want strong wear without damaging their natural nails because it is both flexible and long-lasting. Acrylic nails are strong, but they aren’t the best choice for people who want to keep or grow their nails healthy because of how stiff they are and the risk of thinning them.
Remember that any nail enhancement method—be it builder gel, gel extensions, polygel, acrylic nails, or any other—can cause damage if not applied and removed carefully. Ensuring the preservation of natural nail health becomes crucial when you seek a skilled nail technician who has received the appropriate training and is an expert in the chosen technique. Ultimately, your natural nails will remain intact before and after the augmentation process if you use the correct technique and work with a qualified professional.
Understanding the difference between gel and builder gel
Even though they’re both gel nail products, builder gel and ordinary gel (gel polish) serve different objectives and have different application methods.
In its most basic form, regular gel polish—also known as normal gel nails—is a UV or LED lamp-curing agent for long-lasting nail polish. Its principal use is to cover nails in shiny, eye-catching colors. However, it doesn’t do anything to strengthen nails or make them seem longer.
On the other hand, builder gel is a thicker, more durable solution specifically made to reinforce structural elements and lengthen nails. This is a great option if you have weak or short nails because of its adaptability. You can use it to lengthen your natural nails or add thickness. In contrast to standard gel polish, you can file and sculpt builder gel, opening up a world of possibilities for unique nail art.
The degree of customization and creativity they allow is another striking feature. Regular gel polish is available in a broad spectrum of colors to accommodate a variety of tastes in nail art. Nonetheless, the main goal is to add shine and color to the nails without causing major structural changes. In contrast, builder gel offers more room for personalization, so nail artists and aficionados can mold and form it to make all sorts of nail improvements, such as overlays, extensions, or elaborate designs. Builder gel is the best option for individuals wanting more structural changes and artistic freedom in nail art because of its flexibility and versatility.
Understanding the difference between polygel and builder gel
There are two types of gel nail systems, polygel, and builder gel. Each has its unique qualities that make it ideal for different kinds of nails.
The powdered polygel comes in plastic storage containers, while the liquid gel is available in bottles or containers protected from ultraviolet light. The product is usually available in tubes and has a consistency similar to putty. In contrast, building gel comes in a more solid form and its packaging is usually in bottles or UV-proove compact containers.
The application methods of polygel and builder gel involve priming natural nails with a bonding agent before applying the gel. The curing processes of polygel and building gel are different, though. Because it does not air-dry, building gel needs curing with a UV or LED lamp, unlike polygel.
As far as environmental sensitivity is concerned, polygel and building gel couldn’t be more different. Cold, dry, and dark places are required for the storage of polygel since it is photosensitive. Builder gel, on the other hand, is temperature-sensitive but not UV-sensitive.
The two most important characteristics that differentiate these systems are their strength and flexibility. For situations requiring strong additions, go no further than builder gel, which is rigid and long-lasting but not particularly flexible. On the other hand, polygel is ideal for situations that call for a combination of strength and flexibility since it combines the durability of an acrylic with the flexibility of building gel.
Also, the method of removal is different. Although you can use both methods, different types of building gel have different instructions; some only need filing off, while others allow soaking. To remove polygel, you must soak it and file it off. It’s best not to file too much on your natural nails, though.
Generally, polygel is useful when flexibility is more important than durability, while builder gel is preferred when durability is more important than flexibility. Builder gel is the way to go if you need to strengthen damaged nails and promote healthy development. Conversely, situations that need increased flexibility without sacrificing durability are best served by polygel.
Although prices vary, you may expect to pay less for builder gel than gel and more for polygel than for either acrylic or builder gel. There is a difference in the difficulty associated with applying each gel type. In contrast, both polygel and builder gel require lamp curing, polygel is easier to work with for beginners.
Understanding the difference between rubber base and builder gel
Composition
Rubber Base Gel: The self-leveling formula gives this gel more flexibility, and the thicker inhibition layer makes it more like a standard gel base. Incorporating volume and a flawless apex without overly lengthening the nail, it conforms to the natural nail’s shape and contours.
Builder Gel: Builder gel is thicker in consistency than rubber base gel. It is applied to strengthen and extend nails and hardens after curing. Its lack of flexibility is most noticeable compared to traditional acrylic nails or rubber base gel.
Usage and Durability:
Rubber Base Gel: Use it mainly to fortify and amplify your nails without growing them any longer. This product is perfect for those who want stronger nails and more flexibility because it self-levels and offers elasticity.
Builder Gel: Apply it to your nails to lengthen and strengthen them. It’s more robust and long-lasting than rubber base gel because of its thicker and less pliable composition. Those who want longer and stronger nails will find this product ideal.
Flexibility and Longevity:
Rubber Base Gel: Notable for its flexibility, which makes it impact-resistant. It provides protection and strength without stretching the nail, making it ideal for individuals with thin, weak, or flexible nails.
Builder Gel: Rubber base gel is more flexible, but this one lasts longer. Because it hardens, it is more likely to crack or break when struck. Offers durability and longevity for individuals looking for hair extensions that last longer.
Recommendation for Usage:
Rubber Base Gel: Ideal for those who want to strengthen and protect their nails without growing them longer if their nails are already weak, thin, or flexible. It is ideal for everyday usage and protecting against breakage, it is flexible and strong.
Builder Gel: If you want your nails to be stronger, longer, and last longer, this product is for you. Suitable for individuals seeking nail extensions or increased durability, providing sturdy enhancements but less flexibility compared to rubber base gel.
Lastly, whether you go with builder gel or rubber base gel is really up to you. Consider using rubber base gel if you’re looking for a solution that offers mild strengthening, protection, and flexibility without needing nail extensions. Conversely, those seeking stronger, longer, and more durable extensions will benefit from builder gel, but it does diminish flexibility. For the best results, use both products together; for example, apply builder gel for length and a rubber base coat for a more polished look.
Understanding the difference between structure gel and builder gel
Structure gel and builder gels are the names of the same product. There is no difference in them.
What is the best cleanser to take off builder gel
The best way to remove the builder gel is using an Acetone. First, buff your nails using any nail file or nail drill, then soak a cotton ball in acetone, place it over your nails, and let it sit for 15 to 20 minutes; you can use foil wrapped around these cotton balls. Gently clean off the gel residue from natural nails. If you don’t want to use acetone or want to try some DIY gel cleanser, then soak off your nails in some warm water and dishwashing liquid. Then, after 10 or 15 minutes, remove the gel with a wooden cuticle pusher. Try to be gentle on your nails as much as possible. Then, buff the nails and remove the remaining gel with nail polish remover.
What is builder gel infill?
In order to keep your Builder Gel manicure looking great and lasting as long as possible, you must infill your nails with fresh Builder Gel at regular intervals. Infilling is the process of reviving the nails with a new builder gel application to protect them from harm so they stay in great shape for a long time.
The infilling treatment restores the nails by adding more Builder Gel, which keeps them from breaking and makes them look beautiful. If you want your Builder Gel nails to last as long as possible while still looking great and holding up well, this is an important step.
How to infill BIAB
A good grasp of the BIAB (Builder in a Bottle) infill technique is essential for keeping perfect nails. You should start by delicately filing the nails, removing the topcoat, and shaping the edges. To create a canvas free of cuticles, push them back. It is important to clean the nails well to eliminate dirt or oil.
Before infilling, prep the nails. Then, evenly distribute builder gel from the cuticle to the tip, covering every area. Cure in a light using ultraviolet light or light electronic diode. Make sure to document any discrepancies thoroughly. For a shiny finish, apply a gel topcoat. With enough experience, you can achieve stunning BIAB nails that last four to six weeks without touching up your nails as often.
Video Guide: How to infill BIAB at home
What is gel builder overlay?
Gel builder overlay is the term for applying a layer of builder gel to strengthen natural nails.
What is the difference between BIAB and builder gel
Builder gel and BIAB are not the same things. BIAB (Builder in a Bottle) refers to a trademark name given by The Gel Bottle brand; there are other builder gel formulas available by different Nail brands like “Grow Gel” by Dali Artistic’s, Glitterbel’s “Brush on Builders” and Gelish offers “Structure Gel”
What is builder hard gel vs sculpting gel
From a nail art perspective, you should know that the words “hard gel,” “builder gel,” and “sculpting gel” all represent the same product. The two terms are just ways of referring to the same kind of gel. All the terms used to describe gel for nail enhancement—hard gel, builder gel, and sculpting gel—mean the same thing and have the same function.
Can you use builder gel as a top coat?
Under some circumstances, you can use builder gel as a top coat because of its long-lasting properties and its capacity to improve structural integrity. For nail art designs that need extra structure or durability, it offers further protection and strength when done correctly. However, there are situations in which extreme caution is necessary to prevent potential harm.
If your nail art creations could use a little more staying power, or if they require some extra structure, try using builder gel as a final coat. Intricate or extension-based designs are particularly vulnerable to chipping or breaking, but this product does a good job of preserving and fortifying the nails.
However, you must be aware of the situations in which you should not apply builder gel as a top coat. If applied to thick or large nails, it could cause over-thickening and damage, making them even more brittle and susceptible to breaking. Avoid applying builder gel to natural nails that are already thin or brittle as it can weaken them instead of strengthening.